
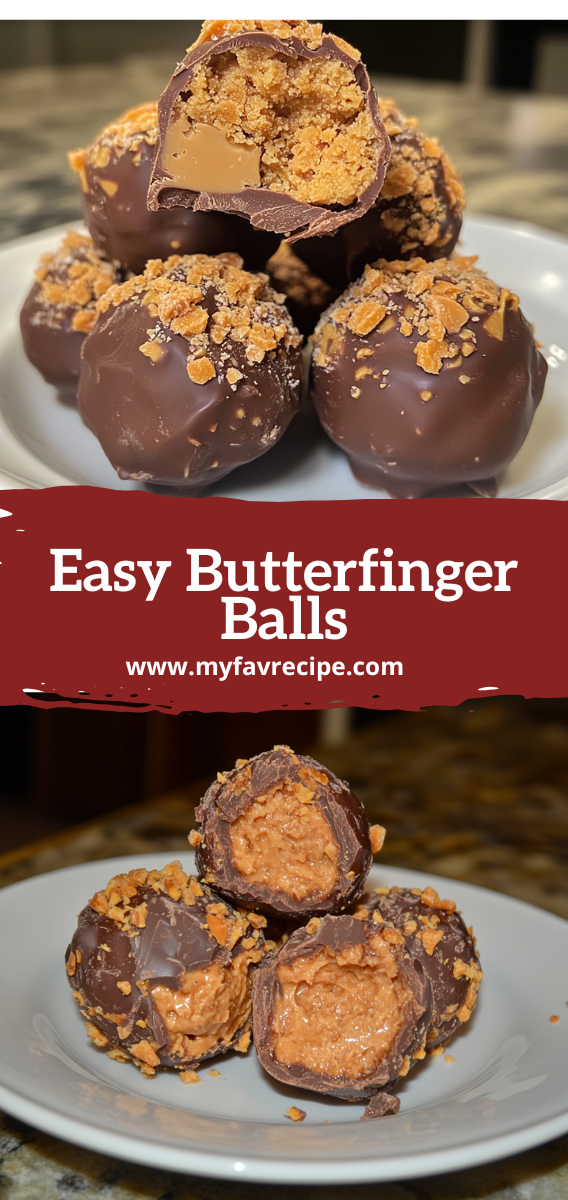
Homemade Easy Butterfinger Balls – No-Bake Candy Recipe
Craving a sweet treat? Try these easy Butterfinger balls! This no-bake dessert brings the beloved candy bar to life in bite-sized form. With just a few simple steps, you can whip up a batch of these peanut butter candies in no time.

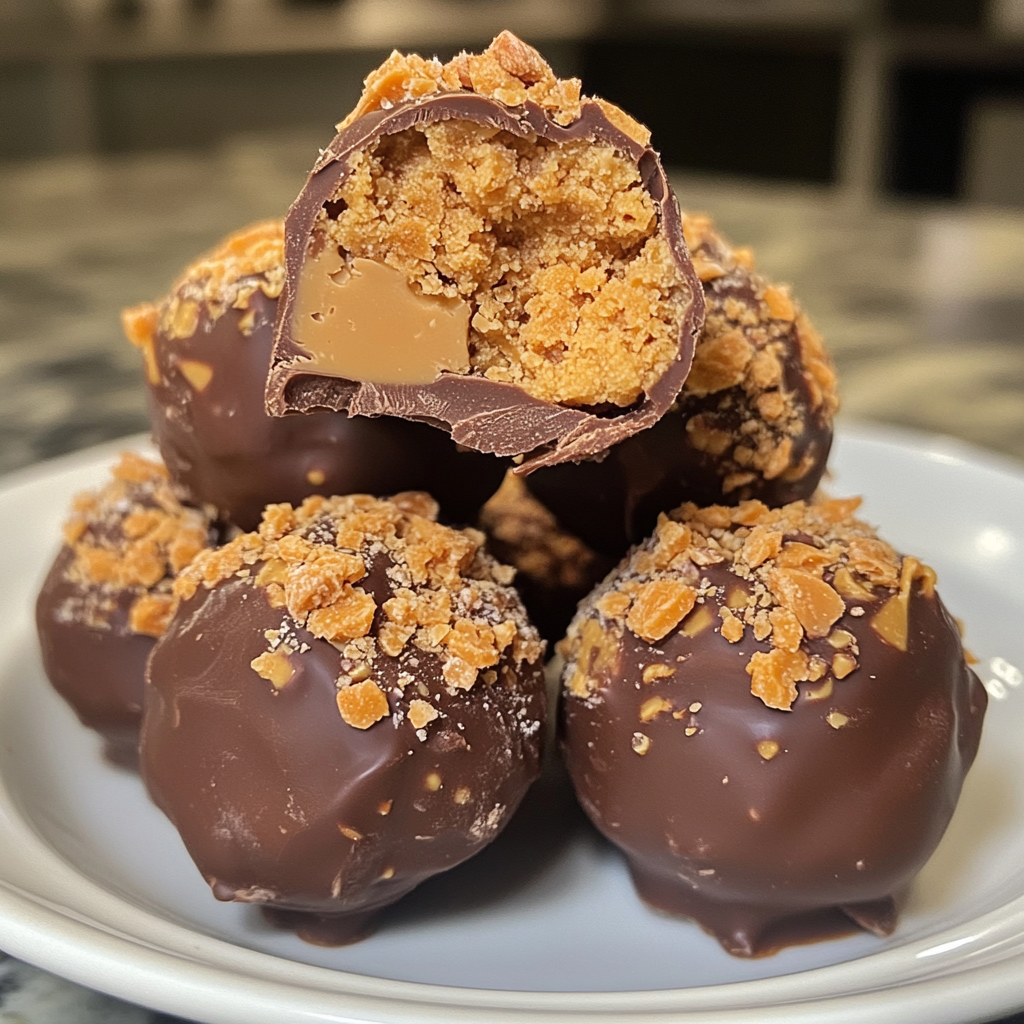
Perfect for parties or quick snacks, these homemade goodies capture the essence of Butterfingers. The creamy peanut butter center and crispy coating make for an irresistible combo. Best of all, there’s no need to turn on the oven – these treats come together without any baking required.
Get ready to indulge in a delightful twist on a classic favorite. Let’s dive into this simple recipe for easy Butterfinger balls that will satisfy your sweet tooth in a snap!
What Makes Butterfinger Balls the Perfect No-Bake Treat
Butterfinger balls are a hit at any dessert table. They mix flavors and textures in a way that kids and adults love. Let’s see why they’re a favorite for snacks and special events.
The Irresistible Crunch Factor
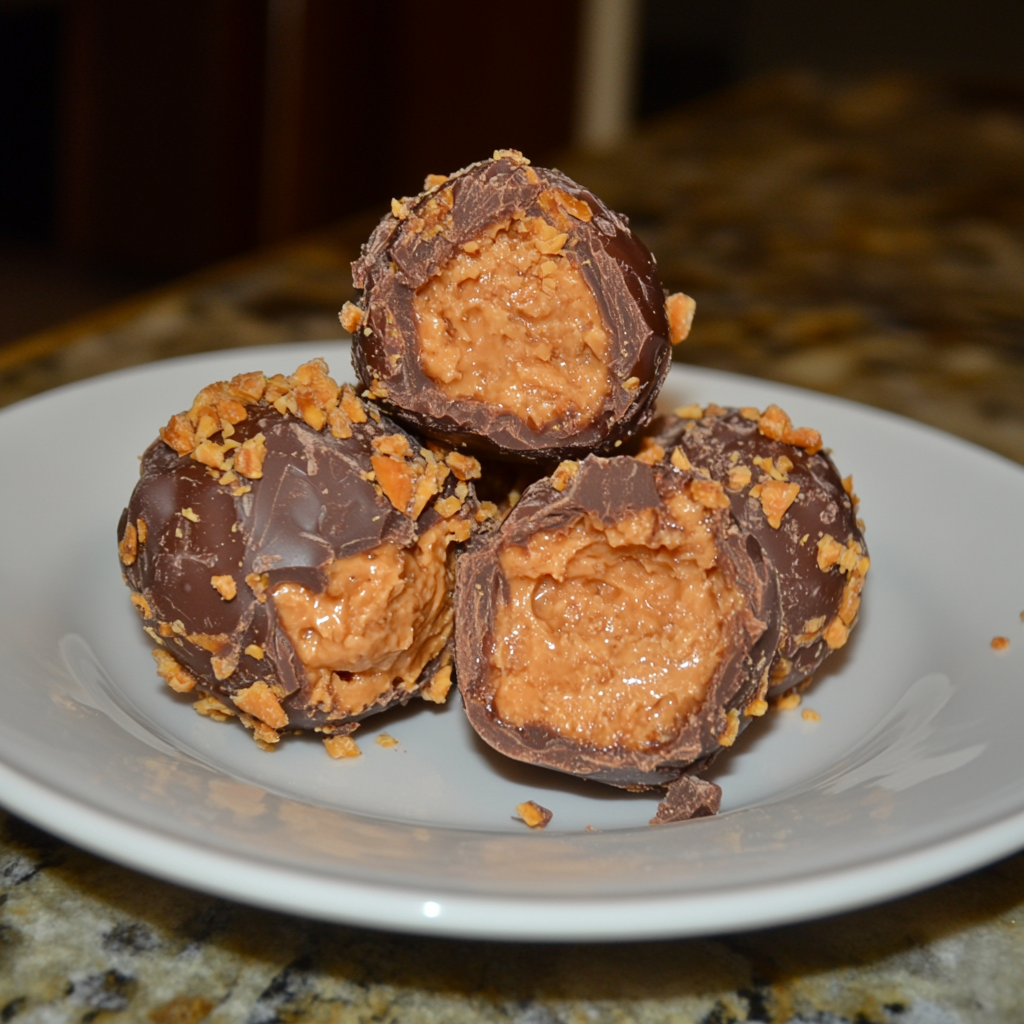
The crunch of Butterfinger balls is unique. They have a crispy peanut butter center covered in smooth chocolate. This mix of crunch and creaminess makes them stand out.
Quick Preparation Time Benefits
Butterfinger balls are easy to make. They don’t need baking, which is great for:
- Last-minute party preparations
- Quick after-school snacks
- Fun cooking activities with kids
You can make a batch of these tasty treats quickly.
Year-Round Snacking Appeal
Butterfinger balls are perfect for any time of year. They’re great for:
- Summer picnics and barbecues
- Fall and winter holiday gatherings
- Spring celebrations and Easter baskets
They’re always a hit, making them perfect for all seasons.
Essential Ingredients for Easy Butterfinger Balls
Making delicious peanut butter candy at home is simple. Let’s look at the key ingredients that make these treats so good. With the right stuff, you’ll be making holiday recipes in no time.
Core Ingredients List
To make Butterfinger balls, you’ll need:
- Creamy peanut butter
- Powdered sugar
- Crispy corn flakes
- Milk chocolate chips
- Shortening or coconut oil
Ingredient Substitution Options
Need a substitute? Try these:
- Use crunchy peanut butter for extra texture
- Swap milk chocolate for dark or white chocolate
- Replace corn flakes with rice krispies
Quality Considerations for Best Results
For the best peanut butter candy, choose high-quality ingredients. Go for natural peanut butter without added sugars or oils. Use real chocolate chips for a richer taste. Fresh, crispy cereal adds the perfect crunch to your chocolate treats.
“The secret to unforgettable holiday recipes is using the finest ingredients you can find.”
Remember, the quality of your ingredients affects the taste and texture of your Butterfinger balls. With these tips, you’re set to make mouthwatering peanut butter candy. It will be a hit at your holiday gatherings.
Kitchen Tools and Equipment Needed
Making Butterfinger balls is a fun baking project. It doesn’t need a lot of kitchen tools. You can make delicious treats with just a few basic items.
You’ll need a large mixing bowl to mix your ingredients. A wooden spoon or silicone spatula works great for mixing. If you’re in a hurry, an electric mixer can help speed things up.
For shaping the balls, your hands are the best tools. But if you want them all the same size, you can use:
- A small cookie scoop
- A melon baller
- A tablespoon measure
You’ll also need a microwave-safe bowl to melt chocolate. If you don’t have one, a double boiler on the stovetop works too. Make sure you have:
- Wax paper or parchment paper
- Baking sheets
- Cooling rack
With these simple tools, you’re ready to make Butterfinger balls. This no-bake treat is great for beginners or anyone who wants a quick, fun baking project. Get your kitchen ready and let’s start!
Recipe card
Ready to make some easy butterfinger balls? This no-bake dessert is simple to make. Let’s dive into the recipe card with all the details you need to create these irresistible treats.
Equipment
- Large mixing bowl
- Baking sheet
- Parchment paper
- Microwave-safe bowl
- Spoon or spatula
- Measuring cups and spoons
Ingredient list
- 2 cups crushed Butterfinger candy bars
- 1 cup creamy peanut butter
- 1/4 cup unsalted butter, melted
- 2 cups powdered sugar
- 2 cups milk chocolate chips
- 2 tablespoons vegetable shortening
Instructions
- Mix crushed Butterfingers, peanut butter, melted butter, and powdered sugar in a large bowl.
- Form the mixture into 1-inch balls and place on a parchment-lined baking sheet.
- Freeze the balls for 30 minutes.
- Melt chocolate chips and shortening in the microwave, stirring every 30 seconds until smooth.
- Dip each ball in the melted chocolate and return to the baking sheet.
- Refrigerate the coated balls for 15 minutes or until the chocolate sets.
With this simple recipe, you’ll have delicious easy butterfinger balls ready to enjoy in no time. This no-bake dessert is perfect for satisfying your sweet tooth without turning on the oven.
Step-by-Step Preparation Guide
Making Butterfinger balls is a fun baking project. It results in delicious chocolate treats. Let’s go through the steps to make sure your candy turns out perfect every time.
Mixing the Base
Begin by crushing your Butterfingers into fine crumbs. Then, mix these with creamy peanut butter until they’re well combined. The mix should be sticky but still moldable.
Forming Perfect Balls
Use a small cookie scoop or your hands to shape the mix into balls. Try to make them all the same size for even cooking. Place them on a lined baking sheet.
Chocolate Coating Technique
Melt chocolate chips in a microwave-safe bowl. Stir every 30 seconds until it’s smooth. Dip each ball into the melted chocolate, using a fork to lift it out. Gently tap the fork on the bowl’s edge to remove excess chocolate.
Cooling and Setting Process
Put the coated balls back on the baking sheet. For extra flair, drizzle remaining chocolate over the tops. Refrigerate for about an hour until the chocolate sets completely.
These no-bake chocolate treats are perfect for any occasion. Get creative with decorations to make them festive for holidays or special events. Remember, practice makes perfect, so don’t worry if your first batch isn’t perfect – they’ll still taste amazing!
Storage Tips and Shelf Life
Keeping your Butterfinger balls fresh is key to enjoying these easy desserts long after you make them. Store them in an airtight container to maintain their delightful crunch and flavor. For best results, place a sheet of parchment paper between layers to prevent sticking.
At room temperature, these treats stay fresh for about a week. If you’re planning to save them for upcoming holiday recipes, pop them in the fridge. They’ll last up to two weeks when chilled. For longer storage, freeze them for up to three months.
“I make a big batch of Butterfinger balls every holiday season. They’re always a hit at parties, and it’s great to have some on hand for unexpected guests,” shares home baker Lisa Thompson.
When you’re ready to serve, let frozen balls thaw in the refrigerator overnight. For refrigerated ones, bring them to room temperature about 30 minutes before serving to enhance their texture and taste.
- Room temperature: 1 week
- Refrigerated: 2 weeks
- Frozen: 3 months
Remember, proper storage is crucial for maintaining the quality of your homemade candy. With these tips, you’ll be able to enjoy your Butterfinger balls whenever the craving strikes!
Creative Variations and Decorating Ideas
Butterfinger balls are a blank canvas for creativity. You can turn them into festive Christmas candies or fun snacks for kids. Let’s explore some exciting ways to decorate and customize your Butterfinger balls.
Holiday Magic
Make your Butterfinger balls festive for the holidays. Drizzle white chocolate over the dark chocolate for a snowy look. Sprinkle red and green sugar crystals on top for a festive touch. You can even shape the balls into small trees or stars before coating them in chocolate.
Flavor Twists
Try new flavors to add a unique twist to your Butterfinger balls. Mix in crushed peppermint candies for a cool, minty flavor. For a nutty variation, roll the balls in chopped pecans or almonds before coating them in chocolate. You can even add a dash of cinnamon or pumpkin spice to the mixture for a warm, cozy flavor.
Kids’ Corner
Make Butterfinger ball making fun for kids. Let them roll the mixture into balls or help with the chocolate dipping. Set up a decorating station with sprinkles, colored sugar, and small candies. Kids can create their own unique designs, making these treats extra special.
- Use food-safe markers to draw faces on the coated balls
- Create animal shapes by adding candy eyes and ears
- Roll the balls in coconut flakes for a snowy look
These creative ideas will turn your Butterfinger balls into eye-catching treats perfect for any occasion. Let your imagination run wild and have fun decorating!
Troubleshooting Common Issues
Making easy butterfinger balls can be a fun no-bake dessert experience, but sometimes things don’t go as planned. Let’s tackle some common problems you might face and how to fix them.
Texture Troubles
If your butterfinger mixture is too crumbly, add a bit more peanut butter. Too sticky? Mix in extra crushed butterfingers. The perfect consistency should hold its shape when rolled into balls.
Coating Conundrums
Chocolate coating not sticking? Make sure your butterfinger balls are chilled before dipping. If the chocolate is too thick, thin it with a teaspoon of vegetable oil. For smooth coating, use a fork to dip and tap off excess chocolate.
Setting Snags
Balls not setting properly? Place them in the refrigerator for faster firming. If they’re still soft after cooling, you might need to adjust your ingredient ratios in future batches.
Storage Slip-ups
To keep your no-bake dessert fresh, store butterfinger balls in an airtight container. Separate layers with wax paper to prevent sticking. They’ll stay tasty in the fridge for up to a week or in the freezer for a month.
“Remember, practice makes perfect. Don’t get discouraged if your first batch isn’t flawless. Each attempt will bring you closer to mastering these delightful treats!”
Conclusion
Homemade Butterfinger balls are a tasty treat that everyone loves. They mix crunch and sweetness perfectly, making them great for any event. Plus, they’re easy to make with just a few ingredients and no baking needed.
Butterfinger balls are also super flexible. You can make them special for holidays or add your own twist. They’re also great for kids to help with because they’re fun to decorate. And, they keep well, making them perfect for busy homes.
Even if you’re new to baking, this recipe is easy to follow. You’ll learn how to mix the base and coat it in chocolate. Our tips will help you avoid common problems, so your treats will always turn out right.
So, what are you waiting for? Get your ingredients ready and start making these delicious Butterfinger balls. They’re not just easy to make; they’re a wonderful way to spread happiness in your home and share with your loved ones.
FAQ
Can I make Butterfinger balls without peanut butter?
Yes, you can make Butterfinger balls without peanut butter. Try using almond butter or sunflower seed butter for a different taste. Remember, it won’t taste like the classic Butterfinger.
How long do homemade Butterfinger balls last?
Homemade Butterfinger balls last up to 2 weeks in the fridge if stored in an airtight container. You can freeze them for up to 3 months for longer storage.
Can I use milk chocolate instead of dark chocolate for coating?
Definitely! You can coat your Butterfinger balls with milk chocolate, dark chocolate, or white chocolate. Each will give a unique flavor, so pick what you like best.
Are Butterfinger balls gluten-free?
Most homemade Butterfinger balls are gluten-free. But, always check your ingredients, like candy corn and graham crackers, to make sure they don’t have gluten.
Can I make these Butterfinger balls vegan?
Yes, you can make vegan Butterfinger balls. Use vegan butter, vegan graham crackers, and vegan chocolate for coating. Find a vegan candy corn alternative or skip it.
How can I prevent the chocolate coating from cracking?
To avoid chocolate cracking, keep your Butterfinger balls at room temperature before dipping. Don’t refrigerate them right after coating. Let them set at room temperature first.
Can I use a food processor to mix the ingredients?
Yes, a food processor is great for mixing Butterfinger ball ingredients. It’s perfect for crushing graham crackers and mixing everything well.
Are these Butterfinger balls suitable for holiday gift-giving?
Absolutely! Homemade Butterfinger balls are perfect for holiday gifts. Package them in festive boxes or tins for a special treat that everyone will enjoy.
Butterfinger balls
Ingredients
Equipment
Method
- Mix crushed Butterfingers, peanut butter, melted butter, and powdered sugar in a large bowl.
- Form the mixture into 1-inch balls and place on a parchment-lined baking sheet.
- Freeze the balls for 30 minutes.
- Melt chocolate chips and shortening in the microwave, stirring every 30 seconds until smooth.
- Dip each ball in the melted chocolate and return to the baking sheet.
- Refrigerate the coated balls for 15 minutes or until the chocolate sets.
