
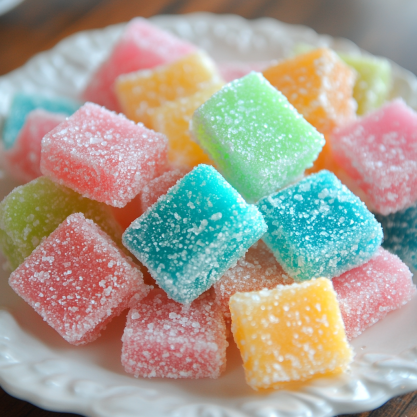
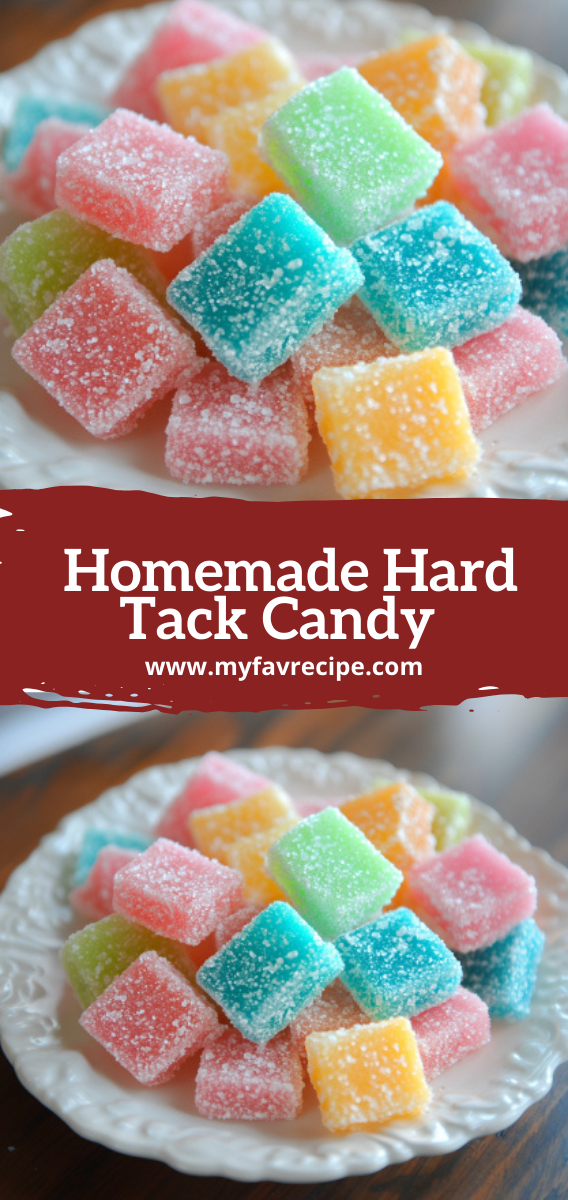
Easy Homemade Hard Tack Candy Recipe You’ll Love
Discover the magic of making vintage candy recipes in your kitchen! Hard tack candy is a delightful tradition that brings families together. It’s a simple yet delicious way to connect generations.
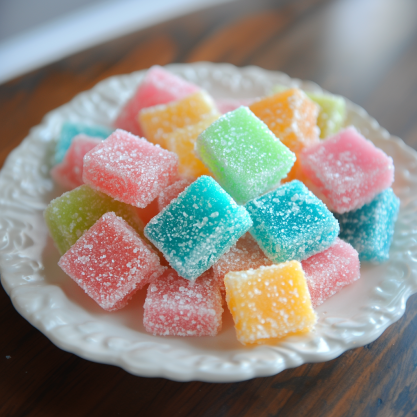
Making your own hard tack candy is more than just a sweet snack. It’s about creating memories. Whether for holiday gatherings or summer picnics, this recipe is a fun culinary adventure.
Homemade candies like hard tack add a personal touch to any event. With just a few ingredients and patience, your kitchen becomes a sweet-making haven. Everyone who tastes it will be delighted.
Get ready for a delicious journey into traditional candy making. This recipe will help you make perfect hard tack candy every time.
What is Hard Tack Candy: A Sweet Journey Through Time
Hard tack candy is a sweet peek into the world of old-fashioned treats. These sweets have won the hearts of many for years. They share a story of culinary history and preservation techniques that still excite candy fans.
Historical Origins of Candy Making
The history of hard tack candy goes back to early European candy making. Candy makers created these treats to keep sugar fresh without refrigeration. Craftspeople cooked sugar mixtures to make crystallized sweets that lasted a long time.
- Originated in European kitchen traditions
- Developed as a method of sugar preservation
- Crafted using simple cooking techniques
Why Hard Tack Candy Endures
These sweets remain popular for good reasons. Families keep recipes alive, linking generations through candy making. The flavors and simple ingredients of hard tack candy appeal to all ages.
“Some treats are more than just candy – they’re a connection to our culinary past.” – Culinary Historian
Today, candy makers and home cooks value hard tack candy’s simplicity and history. These treats offer a tasty bridge to traditional cooking methods. They celebrate flavor and heritage.
Essential Ingredients and Equipment for Hard Tack Candy Making
Mastering sugar crafting techniques requires the right tools and ingredients. Hard tack candy making is an artisanal confectionery art that demands precision and careful preparation.
Let’s explore the essential components you’ll need to create delicious homemade hard tack candy:
Key Ingredients
- Granulated Sugar: The primary base for your candy
- Light corn syrup: Prevents sugar crystallization
- Water: Helps dissolve sugar
- Flavoring extracts: Adds unique taste profiles
Must-Have Equipment
- Heavy-bottom saucepan with high sides
- Candy thermometer
- Silicone baking mat or greased baking sheet
- Wooden spoon or heat-resistant spatula
Professional artisanal confectionery requires precise temperature control. A reliable candy thermometer is crucial for achieving the perfect consistency. Without it, your sugar crafting techniques might fall short.
“The secret to great hard tack candy lies in the details of preparation and equipment.”
Consider investing in quality tools that can withstand high temperatures. Silicone mats provide non-stick surfaces perfect for cooling and shaping your candies.
Optional but Helpful Tools
- Kitchen gloves
- Parchment paper
- Candy molds
- Kitchen scale for precise measurements
With these ingredients and tools, you’re ready to embark on your hard tack candy making adventure!
Hard Tack Candy Recipe: Step-by-Step Instructions
Making homemade candies is a fun adventure. This hard tack candy recipe will show you how to make tasty, traditional sweets at home.
Before starting, it’s important to know the key steps. Being precise and patient is crucial for making these treats.
Preparing Your Workspace
Having a clean workspace is key for making hard tack candy. Get all your ingredients and tools ready to make the process fun and easy.
- Clean and dry all utensils thoroughly
- Set up a large, heavy-bottomed saucepan
- Place a candy thermometer within easy reach
- Prepare a large baking sheet lined with parchment paper
Mixing and Cooking Stages
The magic of making candies happens in the mixing and cooking stages. Follow these steps carefully to make perfect hard tack candy:
- Combine sugar, corn syrup, and water in the saucepan
- Stir gently until sugar dissolves completely
- Stop stirring once the mixture begins to boil
- Allow the syrup to reach the right temperature without disturbing it
Proper Temperature Control Tips
Temperature is very important in making perfect hard tack candy. Precision is key.
“Candy making is a science as much as it is an art” – Professional Candy Maker
- Use a reliable candy thermometer
- Watch for the hard crack stage (300-310°F)
- Remove from heat immediately to prevent burning
- Cool quickly to achieve the right texture
With practice, you’ll get better at this classic hard tack candy recipe. You’ll impress your friends and family with your homemade candies.
Recipe card
Making perfect hard tack candy needs precision and care. This vintage candy recipe brings a nostalgic treat to your kitchen. Let’s explore the key details for making delicious homemade hard tack candy.
Kitchen Equipment Needed
- Heavy-bottomed saucepan
- Candy thermometer
- Large baking sheet
- Silicone baking mat or parchment paper
- Wooden spoon
- Sharp knife or candy break
- Protective gloves
Precise Ingredients
- 2 cups granulated sugar
- 2/3 cup light corn syrup
- 1/4 cup water
- 1 teaspoon flavoring extract
- Food coloring (optional)
Step-by-Step Candy Making Instructions
- Prepare your baking sheet by lining with a silicone mat
- Combine sugar, corn syrup, and water in saucepan
- Heat mixture without stirring until it reaches 300°F
- Remove from heat and quickly add flavoring
- Pour carefully onto prepared baking sheet
- Allow to cool completely before breaking
This classic hard tack candy recipe captures the essence of vintage candy recipes. It brings a sweet piece of culinary history to your home.
*Pro Tip*: Always use caution when working with hot sugar syrup to prevent burns.
Flavoring and Coloring Options for Your Candy
Making retro treats is all about being creative and imaginative. When you make hard tack candy, the flavors and colors are key. They turn a simple recipe into a treat for your taste buds.
Classic flavors include:
- Peppermint
- Cinnamon
- Butterscotch
- Fruit-inspired flavors like cherry and lemon
For those who love to try new things, mixing flavors can make your treats stand out. Here are some unique pairings to try:
- Lavender and honey
- Rosemary and lemon
- Vanilla and cardamom
Adding color to your candy can be fun. Natural food colorings give your treats a pop without artificial stuff. Try these:
- Beet juice for red hues
- Spinach extract for green tones
- Turmeric for yellow shades
“The beauty of homemade candy lies in its ability to surprise and delight!” – Artisan Candy Maker
Just a few drops of food coloring can make your candy look amazing. Start with a little and add more until it’s just right.
Troubleshooting Common Hard Tack Candy Making Mistakes
Mastering sugar crafting techniques for homemade candies can be tricky. Even experienced candy makers face challenges when making hard tack candy. Knowing the common pitfalls helps ensure sweet success in your culinary adventure.
Common issues can derail your candy-making process, but don’t worry! With the right knowledge, you can overcome most obstacles and create delicious treats.
Temperature Challenges in Candy Making
Temperature is key in sugar crafting techniques. Watch out for these potential problems:
- Incorrect sugar syrup temperature can lead to grainy or soft candy
- Using a faulty candy thermometer creates inconsistent results
- Sudden temperature changes can crystallize your sugar mixture
Pro tip: Always use a reliable digital candy thermometer and calibrate it before starting your homemade candies project.
Solving Texture Troubles
Texture is crucial for your hard tack candy experience. Common texture issues include:
- Sticky or soft candy
- Crystalized or grainy texture
- Brittle or overly hard candy
“Precision is key in sugar crafting techniques!” – Professional Candy Maker
Storage Mistakes to Prevent
Proper storage is vital for maintaining your homemade candies’ quality. Avoid these common errors:
- Storing in humid environments
- Using unsealed containers
- Exposing candy to direct sunlight
By understanding these troubleshooting techniques, you’ll become a confident hard tack candy maker. You’ll create perfect sweet treats every time.
Creative Variations and Modern Twists
Turning classic hard tack candy into new creations is a fun journey for those who love retro treats. Today’s candy makers are using new methods and flavors to make these old sweets exciting again.
Here are some ways to make your vintage candy recipes stand out:
- Gourmet Flavor Infusions: Try adding unique ingredients like lavender, rosemary, or exotic spices to make fancy hard tack candies
- Artistic Color Blending: Make marble-like or ombré candies to turn them into stunning visual treats
- Unexpected Texture Combinations: Add sea salt, crushed nuts, or edible glitter for a fun twist
Modern candy makers are mixing old and new to create unique retro treats. You could make hard tack candies inspired by cocktails or use natural sweeteners for healthier options.
“Vintage candy recipes are a canvas for culinary creativity,” says professional pastry chef Emma Rodriguez. “The classic technique provides a perfect foundation for endless innovation.”
How you present your candies can also make them special. Try putting them in elegant glass jars, making custom gift sets, or creating themed collections for different times or cultures.
- Gift packaging ideas for vintage candy recipes
- Themed candy collections
- Personalized flavor experiments
By mixing tradition with new ideas, these beloved retro treats will keep making people happy for years to come.
Storage Tips and Shelf Life Guidelines
Keeping traditional sweets fresh needs careful storage. Hard tack candy, a tasty piece of history, needs special care. The right storage keeps your treats crunchy and flavorful for weeks or months.
Best Storage Containers
Choosing the best container is key for your hard tack candy. Here are some top picks:
- Airtight glass jars with rubber seals
- Plastic containers with tight-fitting lids
- Ceramic candy dishes with sealed covers
- Vacuum-sealed bags for long-term preservation
Humidity Control Methods
Moisture is hard tack candy’s biggest foe. Protecting your traditional sweets from humidity keeps them crunchy and prevents them from getting sticky.
- Use silica gel packets inside storage containers
- Store in a cool, dry place away from direct sunlight
- Avoid storing near kitchen appliances that generate heat
- Consider using a dehumidifier in your storage area
Pro Tip: Always let your hard tack candy cool completely before storing to prevent condensation.
By following these storage tips, your homemade hard tack candy will stay a tasty treat. It will honor the tradition of preserving food through history.
Conclusion
Making hard tack candy is more than a recipe. It’s a journey into culinary heritage. This tradition connects generations through the joy of creating something sweet.
The hard tack candy recipe turns basic ingredients into sparkling treats. It’s a craft that brings back nostalgic memories.
Every batch of homemade candy has a story. Whether it’s a family classic or a new flavor, the making is special. The kitchen fills with sweet smells, and each piece shows off your skills.
We invite you to join this tradition. Start with the classic recipe and then get creative. Try different flavors and colors. Share your candies with loved ones, making memories that last.
Remember, making perfect hard tack candy takes time. Don’t get discouraged by early tries. Each batch is a step towards mastering candy-making. Enjoy the journey, relish the outcome, and celebrate the art of homemade sweets.
FAQ
How long does hard tack candy typically last?
Hard tack candy can last 2-3 months if stored right. Keep it in an airtight container in a cool, dry place. Avoid humidity and direct sunlight to prevent stickiness or sugar crystallization.
Can I make hard tack candy without a candy thermometer?
You can make hard tack candy without a thermometer. Experienced candy makers use the cold water test. This involves dropping hot syrup into cold water to check its consistency.
What are the most popular flavors for hard tack candy?
Popular flavors include peppermint, cinnamon, butterscotch, and cherry. Traditional recipes often use fruit extracts or essential oils. These give a nostalgic taste that reminds people of old-fashioned candy-making.
Is hard tack candy safe for children?
Hard tack candy is safe for kids over 4 years old, but adults should watch them. It can be a choking hazard for young children. So, it’s important to keep an eye on kids while they enjoy it.
Can I make sugar-free hard tack candy?
Yes, you can make sugar-free hard tack candy. Use sugar alternatives like erythritol or stevia-based sweeteners. But, the texture and cooking process might be different, so you might need to experiment.
What’s the best way to prevent sugar crystallization?
To prevent sugar crystallization, don’t stir the syrup once it boils. Use a clean pot and wash down sugar crystals from the sides with a wet pastry brush during cooking.
How do I prevent my hard tack candy from becoming sticky?
Store your candy in a cool, dry place with low humidity. Use silica gel packets in your container. Also, coat the candies in powdered sugar or cornstarch to absorb moisture.
What equipment do I absolutely need to make hard tack candy?
You’ll need a heavy-bottomed saucepan, candy thermometer, baking sheet, parchment paper, and a sharp knife or candy-breaking tool. A silicone mat can also help with removing the candy.
Hard tack candy
Ingredients
Equipment
Method
- Prepare your baking sheet by lining with a silicone mat
- Combine sugar, corn syrup, and water in saucepan
- Heat mixture without stirring until it reaches 300°F
- Remove from heat and quickly add flavoring
- Pour carefully onto prepared baking sheet
- Allow to cool completely before breaking

